
Introduction
I was sent this great little Vaping gadget by the very kind team at HOG Vaping for for the purpose of this review, from their great selection of vape gear they have on their website.Presentation
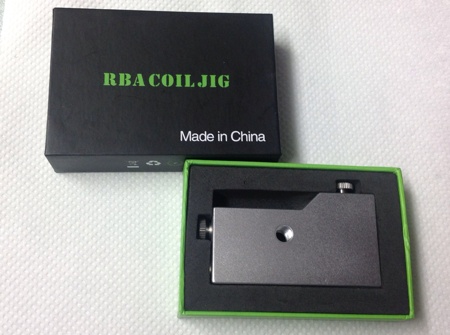
The RBA Coiling Jig, arrived in a really nice black presentation box, with the product description on the front of the box 'RBA COILING JIG' written in a green military style lettering, with made in Chine underneath. On the back of the box you have the Rainbow Heaven logo printed onto the box. One end of the box is bright green.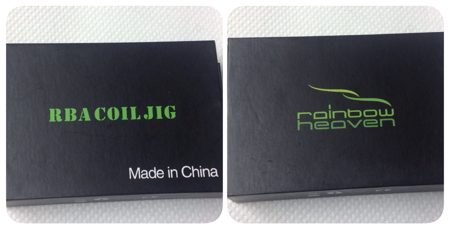
With a little sharp shake, the inner box starts to slide out. Allowing you to pull out the bright green inner part of the box. Which has a dense black foam, which securely holds the jig in place. A very well package piece of kit.
Features and Specification.
Technical Specification.
Model : RBA COILING JIG
Manufacturer : Rainbow Heaven
Type : Coiling Jig
Material : aluminium body ,stainless steel pins
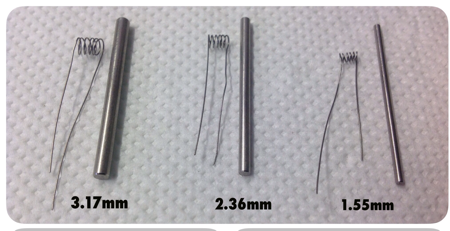
Peg Sizes : 1.55mm, 2.36mm & 3.17mm
Width : 15mm
Height : 38mm
Lenght : 69mm
Weight : 104g
The coil jig comes in the box fully assembled, so we will start off this review by breaking it down into its component parts, looking at each part in detail, then put it back together, to build some coils.
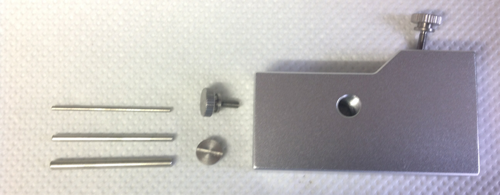
Coil Jig Body
The Coil Jig body is machined from a solid piece of aluminium, so has a nice amount of weight, and feels solid in the hand.
The Body section has a five holes drilled out of it.
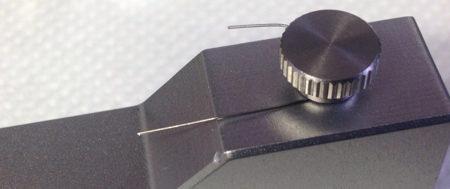
In the top shoulder of the jig, there is a threaded hole, where the the stainless steel threaded thumb screw, is fitted, this screw is used to secure the coil wire when winding a coil.
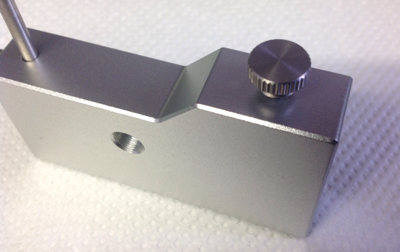
At the other end of the jig , there are two holes, the lower hole covered by a flat headed screw, is where you store the coil pegs when not in use.

The lower screw can easily be removed with your thumb, and once unscrewed and removed, you can simple tip out the three coiling pegs.

The second threaded thumb screw is used to secure your chosen coiling peg in place.
By simply undoing the top screw, it opens the top hole,
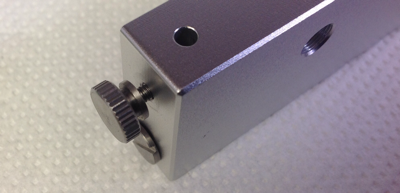
You can then simple drop the chosen coiling peg, into the hole, and re-tighten the end thumb screw to hold it securely in place. It only needs to be figure tight.
(

On the face of the coiling jig, you will find another hole, which is threaded out to allow you to screw down any of your 510 connection RDA's allowing you to use the Jig as a build deck once you have made your coils.

Coil Winding Pegs
The RBA Coiling Jig, comes with three stainless steel polished pegs, each peg is 40mm long, the three different diameter pegs, allow a great choice of coil size, the smallest being great for Mirco coils being only 1.55mm wide. The next size up is 2.36mm, which is the one I have used on my dual coil builds. The last of the pegs is 3.17mm which allows you to make nice fat coils.
AESTHETICS & BUILD QUALITY
The Coil Jig in my opinion looks great, and I think the first thing that strikes you when you take it out of the box and start building on it, just how well made it is. It is machined to a very high standard, with all the screw threading, ultra smooth.All the edges of the jig are nicely rounded off, leaving no sharp edges.
It just feels great in hand when coiling, and is compact enough to fit into you Vapors tool kit.
COILING & REAL WORLD EXPERIENCE
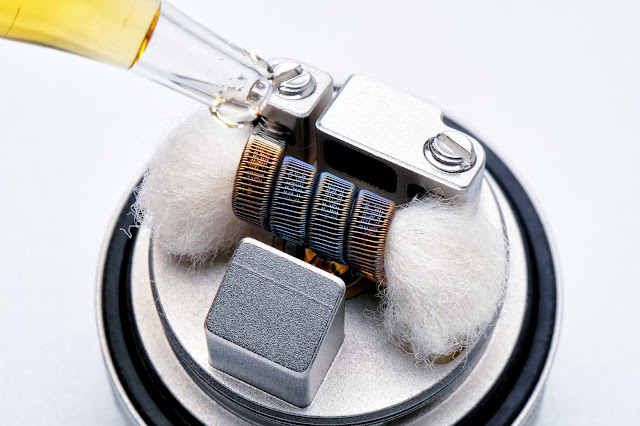
Once you have chosen your desired peg size and secured it in place with the thumb screw.You can the pull a length of Kanthal from your roll, pulling through enough to make your coil, and secure one end under the top shoulder screw.

Then holding the Jig in one hand you can wrapp you Kanthal tightly around the peg, without having to secure the other end of the wire.

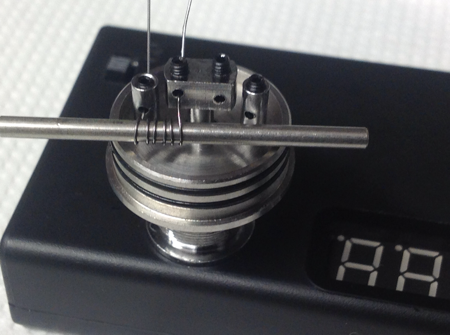
Once you have wrapped the coil the desired amount of times, and squeezed your coil together with a pair of tweezers. You can simply snip the secured end of the wire.

Then you can loosen off the thumb screw holding the peg in place and simply slide out the peg, leaving the coil on it.

This will just leave a short section of Kanthal left on the jig, so very little wastage, if you with you could make the coil without removing it from the roll, but I just find it easier, cutting a section off.
You can then simple lay the peg across your RDA deck whilst you attach the coil tails, whilst holding the coil securely in place on peg. Once fitted, you can the simple slide the peg out.
Recommendation
I would defiantly recommend that you log onto HOG Vaping, and check out this great little piece of kit.I just found it so easy to use, and made some great coils, across the full range of sizes.
It just seems to allow you to make tighter coils. And the pegs are a great size to work with on the deck, when building, rather than a long screw driver. And I found the coils just slide of the polished pegs so easily without disturbing the coils.
For someone new to RDA build and making coils, this bit of kit is a must. Or even and experienced builder, I think it just makes life so much easier. And makes great little tight coils.
And I not really sure how you would make it any better, very well thought out and designed.
MVR RATING
Presentation: 10 / 10Features & Spec: 10 / 10
Aesthetics : 10 / 10
Build Quality : 10 / 10
Ease of Build: 10 / 10
Overall : 10 / 10